Latest rangoli designs

DESIGNER RANGOLI

Friday, 30 September 2016


               Hi this is a designer rangoli with two colours.  I used red and green colours for this rangoli.Draw the design on the floor with chalk piece. There are six edges in this rangoli. Draw a line along each edge so that we can apply two colours.

              This is a free hand rangoli we can also increase the size according to the space available. Start applying green and red colours alternatively on each edge. After that take white rangoli powder and draw drawing on it according to our wish.

              Here I have drawn buds at the centre with creepers on it. And finally I have decorated the whole rangoli with white dots. We can use any different colour for this. Then finally our rangoli is ready.

FLOWER MUGGU

Thursday, 29 September 2016


         Hello this is a flower and leaf rangoli. Flowers makes the rangoli beautiful. We have to collect fresh and colourful flowers for this type of rangolis.   Here I uses marigold petals of yellow and orange colours, fresh leaves,rose petals and white flowers.

         First draw  the desired design on the floor and start arranging flowers. There are five  circles in this rangoli. Fill the first circle with white jasmine flowers and keep a rose flower  at the centre. Arrange leaves in the second circle as shown in the figure.

       Fill the third circle with yellow marigold petals and fourth circle again with leaves as above.
 The fifth circle is filled alternatively with orange marigold petals and rose petals maintaining uniform distance. Finally on the four sides of the circle decorate with leaves and marigold flowers as in the rangoli.

       These type of rangolis are very attractive if we make at homes,office functions, special occassions and during festivals.Thanks for watching.

FINGER ART RANGOLI

Wednesday, 28 September 2016


         Hi this is a finger art rangoli. We can create wonders with fingers in rangoli. The technique in this finger art rangoli is that we have to draw thick line and with finger if we it in upward directiion we will get like waves.

        The same method is applicable to circle, semicircles. Here I used circle and semicircle method in this.In this rangoli there are four circles in the middle. First draw thick small circle with violet circle. By using finger move the circle. Now we will get first circle.

       Now on that draw the second circle and repeat the process.Now our second circle is completed. In the same way draw third and fourth circles.Now our middle circles are ready. Now on each side of the circle draw semicircles lines and repeat the process.

      The semicircles are completed on the four sides.Now in between the semicircles draw buds on four sides and draw impressions on it with the help of ear bud.Now our design is completed.

LATEST FLOWER RANGOLI

Tuesday, 27 September 2016


     Hi this is latest and simple flower rangoli. Here in this rangoli I used some flower buds, marigold flowers and some rose petals.First draw the outline and start arranging flowers.

    From the centre start arranging flowers buds in a zigzag manner.From the top of the bud again arrange buds in the same way as in the first line. Repeat the process for three lines. After that place a marigold flower at the centre.

     Now keep the jasmine flowers in between the buds and place marigold flower on the top of each jasmine flower.  Now arrange the rose petals in a circular manner as shown  in the rangoli. Finally our desired design is ready. We can use different colour flowers also. Thank you.
    

CIRCULAR FLOWER RANGOLI

Monday, 26 September 2016


             This is  a circular flower rangoli. For this rangoli we need three types of flowers.
Rose petals, marigold petals , roses and some lilly flowers.

             First draw the design on the floor depending on the flowers availability and space. Draw the design with wet chalk piece so that it looks good when it drys. After drawing design place rose petals at the centre circle.Now keep the lilly flowers around it in a circular manner.

            After that  divide the circle into four equal parts and place rose petals and marigold petals alternatively to form a circle. Now again place the lilly flowers around the second circle  in a circular manner.

            Repaet the process to the third circle as we do in the second circle. Now our three circles are ready. Now place the lilly flowers on the two sides of the circle  in semicircle manner and place a rose flower at the centre of that.Now our design is completed.

           If we have more flowers we can increase as many circle as we wish. Hope all liked this. Thank You.

FRESH FLOWER RANGOLI

Sunday, 25 September 2016


                 Hi this is a simple flower arrangement rangoli.  Here I used three types of flowers for this. Lilly flowers, red roses, marigold flowers and some leaves.


                 Take fresh Lilly flowers and remove the base of each flower with the help of knife.Now our flowers are ready to use. Starting from the centre arrange the lilly flowers in the circular way.


                 Now the inner circle is  ready. From the centre of the one flower insert another flower to make a line. For forming a line four flowers are needed. Repeat the process for  all the flowers at the centre. Now the outer circle is ready.

                 Now arrange the lilly flowers in a semi circle way on each side of the circle. Our four sides are ready.Now at each corner  arrange a leaf and marigold flower as shown in the figure. Now finally decorate the rangoli with rose flowers.

                 We can also use jasmine flowers instead of lilly flowers according to the availability.
We can use these simple rangolis at home during festivals. Please post your comments. Thank You.


PATTERN RANGOLI 1

Saturday, 24 September 2016


Hi this is a pattern rangoli with three colours. Patterns may be  drawn in square, rectangle or in circle. Here I used a square for this rangoli. To draw this we need white rangoli powder, green, yellow, pink colours.

          As usual first draw the design on the floor with the help of chalk piece. After our design is completed draw patterns to apply colours. In the above rangoli three blocks are there with eight sides.
Starting from the centre apply colours. In the middle I used pink and green colours alternatively.

         In the second block I used yellow and pink colours alternatively. In the third block also I used same colours. The outline is given with green colour.

        Fianlly I decorated rangoli with white powder with some sequence and dots.Hope all will try this. Thank You.

DESIGNER FLOWER RANGOLI

Friday, 23 September 2016


Hi this is  a designer flower rangoli. Flowers are wonders of nature. We get peace of mind when we look at fresh flowers. Flowers are available in the market according to the season. To draw these type of rangolis we have to select fresh flowers from the market.

            Three types of flowers are needed for this. Yellow and orange marigold flowers petals , rose petals. First we have to draw outline on the floor with the help of colour chalk piece. After getting desired design start arranging petals from the centre.

            This is a eight petaled rangoli, alternately fill yellow petals and rose petals at the centre.
Then on the outer square fill it with yellow petals and on the cross square fill it with rose petals. Keep the orange marigold flower at the centre.

            This is yellow and pink coloured combination rangoli. We can try these with different colour flowers. This is very attractive if we do this during festivals.Thanks one and all.

JEWELLERY RANGOLI

Thursday, 22 September 2016


Hi everyone today I am going to show how to draw ornament rangoli. Now a days jewellery is the most selling product all over the world. Women shows interest to wear different type of jewellery for different different purposes. The jewellery may be made from gold, silver, platinum, beads, kundans and some stones.

       To draw this jewellery rangoli we need basic idea of ornaments.First draw the outline of the design with the help of chalk piece. After that choose colours according to your idea. Here in this rangoli I used yellow,green and red colours for this.

       I draw double beeded jewellery like this. There are 3 huge flower type kundans and a pendant at the middle.After completion of outline the design will look like this.
Now take the yellow colour and fill it in the gaps . Now the final design will look this. We can createany type of jewellery designs like this. Hope all will try this. Thank U.

HOW TO DRAW A CIRCLE IN RANGOLI USING HOUSEHOLD THINGS

Wednesday, 21 September 2016


Hi today I am going to show how to draw a simple circle using cooker washers.For this we need two sizes cooker rubbers, rangoli white powder, colours, funnel. This is also a freehand rangoli. The advantage of free hand rangoli is that we can create the rangoli according to our choice, we can increase the size, which depends on our creativity.

              First clean the floor and place the small size washer as shown in the figure and fill it with blue colour.

Now place the big size washer as shown in the figure.Now fill the outer circle with orange colour.

Now take the funnel and fill it with white powder and start designing it with dots at the outer circle.
Draw some patterns on the circle as shown in the figure.
Then the final rangoli will look like this. This is very easy to draw .The colour combinations depends on our creativity. We can also increase the size of the rangoli. Thanks  for watching.

STEP BY STEP OF DRAWING FREE HAND RANGOLI

Tuesday, 20 September 2016


Hi this is simple rangoli. Things needed are 1.white powder
                                                                         2. Different colour powder

  This is a free hand rangoli. No dots are needed for this. Free hand rangoli is an art flowing from the tip of fingers. The advantage of free hand rangoli is that no dots are needed for this and we can create our own designs in free hand rangoli.

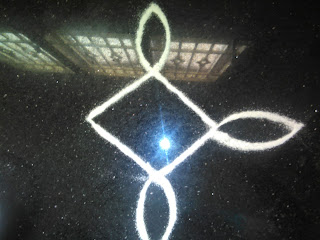
    First draw a simple square in the middle and in the edges draw four buds.

After that draw as shown in the figure with white powder and keep a small circle at the middle.


Now complete the figure as above and start colouring it.


I applied yellow color to all the circles and blue colour to the middle of the bud and complete the figure with the desired colour combinations.


Finally the rangoli will look like this. We can also decorate this with flowers , lamps , kundans etc.
If any up and downs are there in the colouring final coating is again given with white powder to make the rangoli a good look. We can try this with the colours available with us. Thank U.  

FLOWER RANGOLI

Monday, 19 September 2016


Hello every one today I am showing simple flower decoration for beginners. I have collected different type of flowers from my garden. I simply arrange them ina pattern to make a beautiful rangoli. Rangolis are tradition of Indians. Every women wake up early in the morning to make rangolis at their houses. Only three type of flowers I used for this.
Jasmine flowers, marigold flowers and red flowers.


I arrange marigold flower at the middle and red flowers around it. And around them I have arranged jasmine flowers in a circular manner. After that I gave partitions with jasmine flowers as shown in the figure.

After completion of partitions I have kept marigold flower at the top of each partition.


After that I have arranged marigold petals in between the partitions in circular manner. And after that I have repeated the same way with white and red flowers. Finally the rangoli will look in this manner. This type of rangolis are very easy for beginners even children can do this very easily. Hope all will try this. Thanks for watching.

BIG SIZE SILK THREAD BANGLE

Sunday, 18 September 2016


Hi  this is a big size silk thread bangle. This bangle is  best suited to college going students. This is a single bangle. For this things needed are  big size plastic bangle, violet colour silk thread, kundans, stone lace, ball lace and glue.Take plastic bangle of your desired size and start rolling it with 20 strands of silk thread.Repeat this process until the full bangle is completed.Now take orange colour big size kundan and stick it to the bangle with the help of fabric glue. Around the orange kundan stick stone lace and adter that stick ball lace.Now stick the stone and ball chains in the remaining part of the bangle as shown in the figure. Finally the bangle will look like this. Thanks for watching.

Thread bangles

Saturday, 17 September 2016


This is another type of thread bangles. Here 12 bangles are used for this set. Two big bangles and 10 small bangles. Here baby green silk thread is used for this.Along with this ear rings are also made with that green colour thread. Wraping is same as earlier and decoration changes from set to set.Bangles are symbol of tradition for Indian women.They wear bangles according to the occassion. 

SILK THREAD JUMKAS


Hi this is silk thread jumkas. Things needed are jumka bases,kundans,stone lace, ball lace,some beads. First wrap the silk thread to the jumka base by applying glue. After that attach stone and ball lace to it. With the help of the holder and some beads arrange like jumka.Then our desired jumka is ready to wear. We can use colour thread according to the matching of our dress. Thanks for watching.

DOUBLE STEP SILK THREAD JUMKAS

Friday, 16 September 2016


This is double step silk thread jumkas . Here I used two colours violet and gold colour for this. Take jumka bases of two different sizes and start wraping two different colours to the two jumka bases.With the help of the holder attach with the help of beads and bend the holder at the top and arrange studs what ever you like.Here I arranged antique studs to it.We can also make studs of our own. Thank U.

DESIGNER SILK THREAD BANGLES

Thursday, 15 September 2016


Hi this is a red and black combination designer thread bangles set. Here I used six bangles for this set. Two big red bangles, two gold colour and two black colour medium size bangles for this set.Finally I decorated with stone chain. In between these bangles I used stone bangles to make it designer look. Hope all like this. Thank U.

LATEST SILK THREAD BAGLES

Tuesday, 13 September 2016


Hi this is another designer bangle set. Here I ussed 3 colours. Two orange colour bangles, two gold colour bangles and two pink colour bangles. Asusual after wraping threads the decoration is done with stone and ball chains. This is a matching for kanchipuram silk saree. Thank U.

THREAD BANGLES

Monday, 12 September 2016


Hi this is variety silk bangle set. Here I used seven bangles for this. Three big bangles of red colour. Two green colour and two gold colour small bangles.After wraping all these threads we have to decorate the bangles with stone and kundans using fabric glue. Let it dry for two hours. Then our desired set is ready to wear. Here I designed it for a saree. Hope all will try this. Thank U.

THREAD BANGLES

Sunday, 11 September 2016

This is another type of thread bangle. Here I used violet thread to make this. Afteer wraping violet thread to the plastic bangle stone lace is attached to it in three  parts.In between the partitions stone gold colour ball chain is attached to it. The decoration of the bangle depends on our creativity.

MULTI COLOUR THREAD BANGLE

Saturday, 10 September 2016


Hi this is a designer thread bangle.This bangle is designed with four colours and partiions are covered with stone and ball chains and some kundans are arranged on each colour.

THREAD BANGLES

Friday, 9 September 2016


Hi this is another type of thread bangle. Here I have wraped 20 strands of orange silk thread to the  plastic bangle.After wraping I have attached kundan lace to the bangle and after that I have wraped green thread to make it attractive.

THREAD BANGLES

Thursday, 8 September 2016


Today I posted silk thread bangles. Take plastic bangle according to your choice. Roll the silk thread of about 20 strands to the pad or any invitation card. After that cut it with scissor and apply glue to both ends of the thread. Then apply litlle amount of glue to the plastic bangle and start wraping with out gaps. Then finally the bangle will look like this. These type of bangles are suitable for any age group from children to adults. Shortly I will give videos to show how to make the silk thread bangles. Thank You. 

DESIGNER RANGOLI

Wednesday, 7 September 2016


Hi this is simple designer rangoli. Here I used six colours. First I have drawn acircle with red colour and impressions are given on it using fingers and four flowers are drawn on four sides of the circle with yellow colour. Again it is covered with pink colour and outline is drawn with white powder.
After that some leaves and flowers are drawn with green and blue colours and some dots are drawn with white powder

GANESH RANGOLI

Sunday, 4 September 2016


Hi Ganesh Chaturdhi wishes to all. This is a type of poster rangoli. The background is filled with green colour and ganesha impression is drawn on it with white powder. The complete figure is decorated with marigold petals and decorated with diyas to give it a festive look.Thank U.

LEAF RANGOLI

Saturday, 3 September 2016


Hi this is another type of rangoli with different leaves. We can easily try these at homes.

DOTTED RANGOLI

Friday, 2 September 2016


Hi this is 15-1 dotted rangoli. After arranging dots first outline is drawn with white powder according to the shape and different colours are given according to our choice and finally again outline is drawn with white powder to cover the gaps.After that border is drawn as we like. We can also decorate this rangoli with flowers also.

LEAF RANGOLI

Thursday, 1 September 2016


Hi this is a type of leaf rangoli.Here I have collected different type of leaves from my garden and some flowers and arranged in some pattern and decorated with flowers. These type of rangolis are free of cost because they are easily available at our houses. You can try with any kind of leaves available. Thank U.
 
FREE BLOGGER TEMPLATE BY DESIGNER BLOGS